Creating A VPN Connection In Windows
Choice of VPN Router and Configuration
It is recommended that the VPN router chosen to act as the remote VPN server is compatible with Windows platforms (i.e. supports PPTP, L2TP and L2TP over IPSec). This will make the setting up of the VPN client on the remote Windows PC much easier with no special software required. The DrayTek Vigor 2900 Series VPN routers offer this compatibility and were used during tests with London Architect. Other manufacturers VPN routers may require you to install their own proprietary VPN client software on the Windows PC at additional cost (e.g. NetGear 'ProSafe' series).
The VPN router manufacturer's instructions should be followed in order to configure properly for your particular network environment. A VPN user account should be set up for the remote connection. With the DrayTek vigor 2900 router this was a simple matter of using a web browser interface to configure the IP addresses for the public (Internet) connection, and the IP addresses for the private network. Also a VPN user account was setup with 'username' and 'password' and ability to accept PPTP VPN connections.
Using Windows XP Professional As A VPN Server (alternative to VPN server router)
Some installations may already be connected to the Internet via an existing router. If the router does not provide VPN server capabilities, then you can either replace it with one that does, or you can add a VPN server to the network and forward the VPN port from the router to the VPN server.
Windows XP Professional can act as a VPN server and
configuration is straightforward. The advantage of
using a PC as the VPN server is that many installations
will already have a PC for running HiQnet London Architect.
The instructions below describe how to set up a Windows
XP Professional PC as a VPN server.
To configure your computer to accept incoming connections:
-
In Control Panel, click Network Connections.
Under Network Tasks, click Create a new connection to start the New Connections Wizard. The first time you start the New Connections Wizard, the Location Information dialog box appears, requesting country or region, area code and, if necessary, a carrier code and an outside access number. You also need to indicate whether your phone system uses tone or pulse dialing. After typing this information in the dialog box, click OK.
In the New Connection Wizard page, click Next.
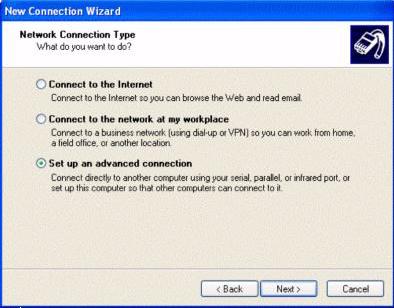
On the Network Connection Type dialog box, select Set up an advanced connection and then click Next.
On the Advanced Connection Options page, select Accept incoming connections and then click Next. This allows other computers to connect to your Windows XP Professional-based computer by means of the Internet, a phone line, or a direct cable connection.

On the Devices for Incoming Connections page, select the check box next to each device you want to use for incoming connections and then click Next. [Please note that "Devices" in this context does not refer to Soundweb London Devices]
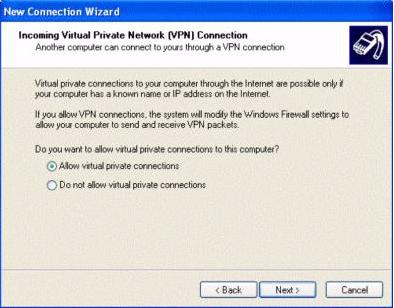
On the Incoming Virtual Private Connection page, select Allow virtual private connections, and then click Next. This enables a virtual private connection so that another computer can use the Internet or another public network to access your computer. For this to occur, your computer must have a known name or an IP address on the Internet. This could be a static IP address, domain associated to a static IP address or domain associated to a dynamic IP address.
On the User Permissions page, select the check box next to each existing user name you want to add, or click Add for each new user you want to add. Click Next. This specifies the name of each user you permit to access your computer.
On the Networking Software page, select the check box next to each type of networking software that should be enabled for incoming connections. Click Next, and then click Finish.
You will need to forward port 1723 from your router to the PC. "VPN passthrough" must also be enabled on the router.
To specify the IP address range of incoming connections:
-
In Control Panel, click Network Connections.
Right click on Incoming Connections and select Properties.
Select the Networking tab.
Select Internet Protocol (TCP/IP).
Click Properties.
Turn on the radio button for Specify TCP/IP addresses.
Enter IP addresses in the From and To fields which are in the same subnet as the Soundweb London devices.
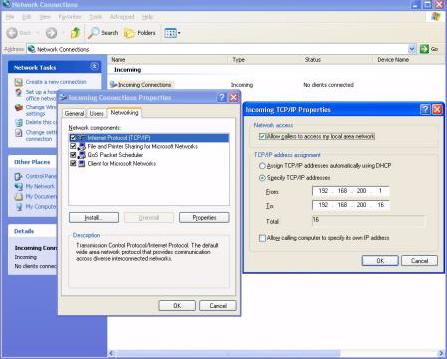
Please note that failing to specify the IP address
range of incoming connections could result in failure
to communicate with the Soundweb London devices.
Configuring the Windows VPN Client (using PPTP)
This section will explain the procedure for creating a VPN client connection under Windows-XP or Windows 2000 with default settings, which will use the PPTP protocol for the connection. This type of connection is easiest to set up and offers good (if not the ultimate) security.
Open Network Connections. (Click Start, click Control Panel, click Network Connections, and then click Network Connections.)
Under Network Tasks, click Create a new connection, and then click Next.
On the Welcome to the New Connection Wizard page of the New Connection Wizard, click Next
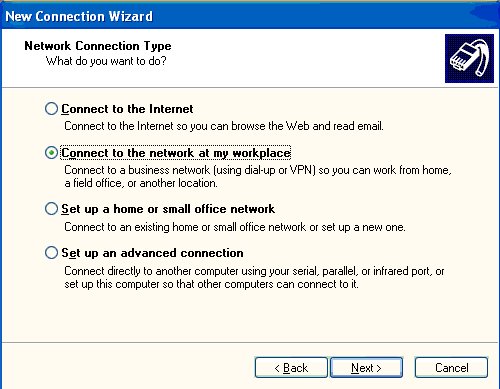
On the Network Connection Type page, click Connect to the network at my workplace, and then click Next as shown below.
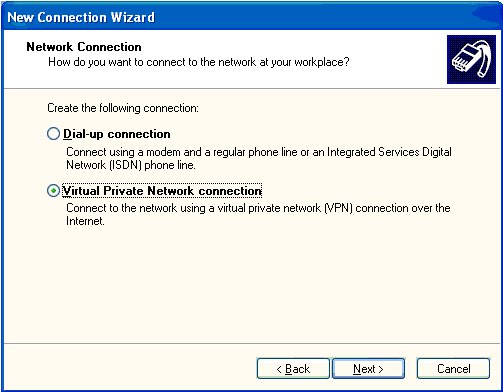
On the Network Connection page, click Virtual Private Network connection, and then click Next as shown below.
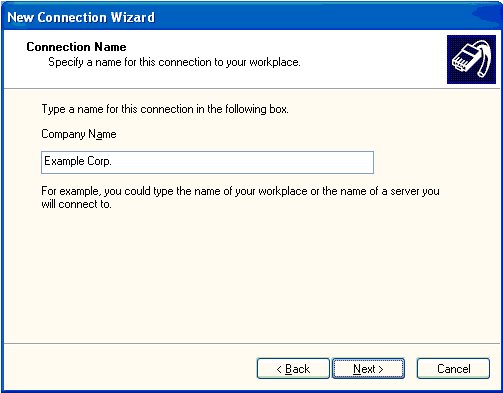
On the Connection Name page, type the name of the connection or your company name, and then click Next.
Select 'Do not dial the initial connection' since dial-up vpn connections are not supported with London because of bandwidth restrictions. This may change in the future as dial-up connections get faster.
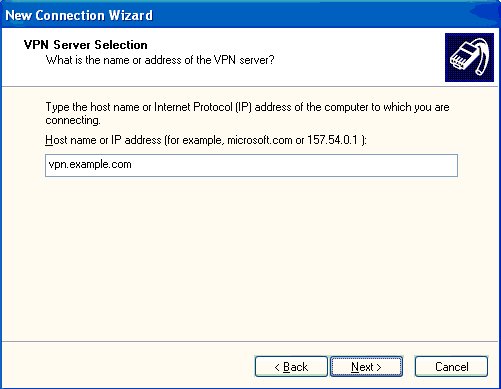
On the VPN Server Selection page, type the Domain Name System (DNS) name or Internet Protocol (IP) address of your company's VPN server on the Internet, and then click Next. An example is shown below.
On the Completing the New Connection Wizard page, click Finish. The VPN connection has now been configured with default settings. For information on how to connect to the VPN and what steps must be taken in order to use London Architect across the VPN, follow this link Using London Architect Across A Vpn